
Liza Prior Lucy is one of Kaffe Fassett‘s longtime design partners and a key member of The Kaffe Collective. While we’ve known Liza for years, our true partnership began back in 2018 when we first started to collaborate on a series of curated designer collections. The release of The Kaffe Collective, Glorious Kantha, and Glorious Handwork was a magnificent way to join forces, giving Kaffe fans far and wide all the tools needed for quilting, piecing, hang quilting, hand appliqué, EPP and more, all in those stunningly rich hues. Since then, we’ve introduced Glorious Kantha 2, with 20 more stunning 12wt colors.
Today, we’re pleased to welcome Liza back to the blog to share her tried and true mask-making method. As we approach the 1-year anniversary of the covid-19 pandemic, there is one thing that we all know to be true– masks save lives. So many in our industry have been tirelessly making masks for first responders and essential workers across the world, from small communities to urban centers. We are grateful for the commitment, the service, and ultimately the compassion shown. While making masks may not always be our favorite task, the process has become second nature for so many, having perfected techniques, fittings, and best practices. Liza and the whole team at The Kaffe Collective have been making masks since this pandemic began. Liza has, herself, made over 1000! She gives them to places to sell for the benefit of local food banks or, in the case of Kaffe’s family’s Phoenix Shop in Big Sur, for the benefit of the fire brigade. She has gotten rave reviews for the mask as they are comfortable and stylish. If you’re still looking for a fool proof pattern, we hope you’ll give this one a try.
Big thanks to Liza for sharing today!
MAKING MY MASKS
Cutting:
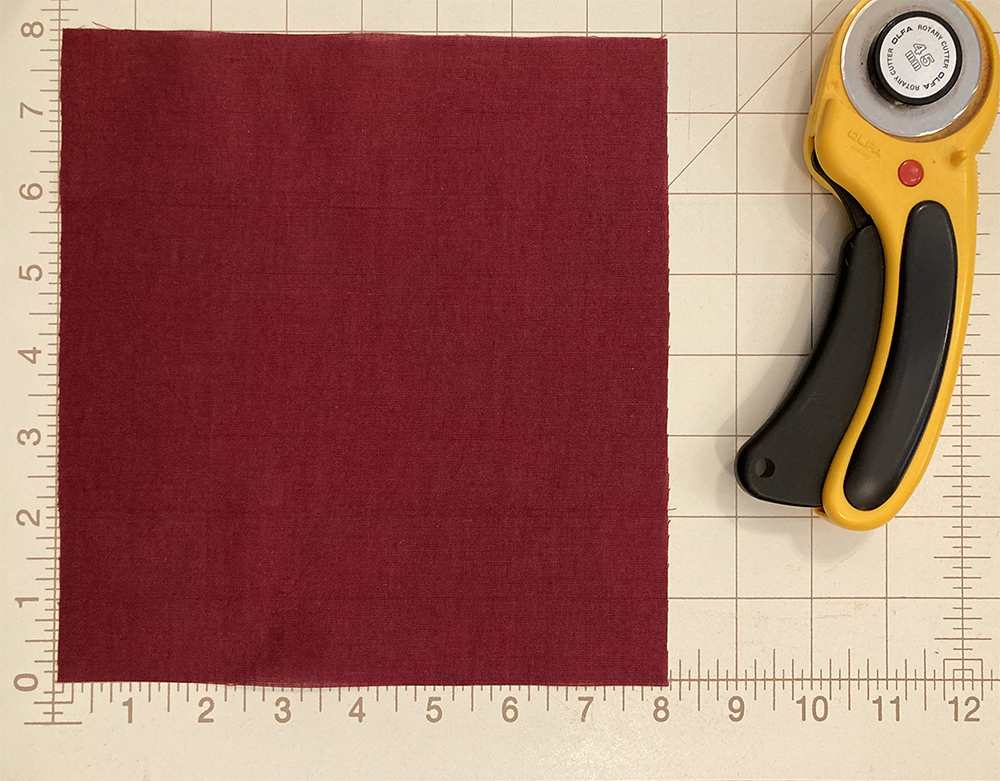
1. Cut 1 each of an outer fabric and a lining fabric. 8” x 8”
2. Cut two strips from outer fabric 1 ½” x 8”
3. Cut a firm piece of cardboard 2” x 12” and another 1” x 12”
4. Cut 2 pieces of elastic, each 7” long or longer if preferred.


Assembling and Pleating:
1. With right sides together sew the outer fabric to the lining using a ¼” seam. Sew together at the top and bottom, leaving the sides unsewn


2. Turn right side out and press seam.

3. Top stitch along both the top and bottom


4. With lining facing up, place the 2” cardboard above the bottom sewn edge and turn up and press flat.


5. Do the same along the top edge, using the 1” cardboard.
**NOTE: The cardboard is used only for measuring and is slipped out after pressing the 2″ bottom and 1″ top creases.


6. Fold the bottom pressed edge to meet the top pressed edge and iron flat. This sets folds that will make pleating easy

7. Unfold and with outer fabric facing up and the bottom edge closest to you, pinch the lowest fold and bring it half way down to the bottom edge. Then pinch the next fold to meet just above the first fold, and do it one more time to make the last pleat. Press well.


Binding the edges and attaching the elastic:
1. Place one of the outer fabric strips face against one of the raw edge sides, right sides together.
2. Fold about 3/8” of the strip over the top edge and place one end of a piece of elastic just below.
3. Sew to attach the strip and elastic using a ¼” seam.

4. Stop about ¾” from the bottom.

5. Cut the strip to about 3/8” below the bottom and fold up.
6. Place the other end of the elastic just above.


7. Sew to the end.
8. Repeat on the other side.


9. Open the binding with lining side up and finger press the top and bottom of the binding down toward the center. It helps to fold these at a bit of an angle, not straight down.

10. Fold the binding raw edge to the pleated edge of the mask and then fold again over the pleated edge and ends of the elastic.

11. Top stitch the binding down, reversing the stitching at the top and bottom to secure.


When I first started making these masks, I was inspired by a few key videos. I ended up changing them for my own preference and clarity. That said, I understand that some people do better with video content than a step-by-step, so I wanted to share those original videos here as well. For the pleating head HERE and for attaching the binding and elastic, head HERE. My masks are cut to a different size than the original and I do not insert the wire nose piece. I also chose to add topstitching to ensure that the masks wear nicely through many launderings.

If you’re looking for elastic, THIS one is my absolute favorite. I used Kaffe’s Roman Glass in Red (Free Spirits Fabrics) & Aurifil 50wt threads.
We have to thank Liza for her kindness and generosity. We’re grateful for this tutorial and hope that you all find it helpful in moving through this next stage! Safe stitching! <3
Thanks for your generosity ❤️🤗
Thank you for the directions for this very cute mask
Awesome cousin Liza. Great tutorial!
We now know some extra layers are needed. I have easily adjusted by using non-woven interfacing to both fabrics. Very easy and adds it a bit harder for the virus to weave it’s way thru.