
Greetings fellow makers! As Master Educator and Aurifilosophy Program Coordinator I’m excited to introduce Shannon & Jason Mullett-Bowlsby, also known as the Shibaguyz! This creative and dynamic Seattle-based duo joined our growing team of Aurifilosophers in 2020. Their award-winning crochet, knit, and sewing designs have long been an inspiration and I’ve loved seeing how they use Aurifil thread to update and honor age-old Japanese techniques like Boro and Sashiko.
We’re thrilled that Shannon & Jason are here today to share a tutorial for creating a Boro and Sashiko Journal Cover! This project utilizes Aurifil 12wt and 50wt, a few fabric scraps, and a bit of ingenuity resulting in the perfect weekend project. Huge thanks to Shannon & Jason!
Aurifilosophy has gone Virtual! Consider scheduling a virtual program for your shop, group, or guild. Learn more about Aurifilosophy and find your favorite Aurifilosopher here.
Happy Stitching!
Karen L. Miller ~ Redbird Quilt Co.
Our Boro & Sashiko Journal Cover is the perfect way to experiment with a few patchwork, embroidery, and sewing techniques without a huge commitment of time. This project perfectly marries so many parts of our own design lives: Techniques from our latest book Boro & Sashiko: Harmonious Imperfection, our two Aurifil thread collections, and our love for using up scraps from previous projects. Perfection!
WHICH FAVORITE BOOK WILL YOU COVER?
We love books; cookbooks, novels, photo albums, and journals. Visitors to our home on more than one occasion have marveled and asked, “have you read all of these?” Yes, we have. Many times over. And, being artists, designers, and authors, the number of notebooks and journals on shelves, tucked into drawers, on the kitchen counter, in the trunk of the car… hey, when inspiration strikes, ya gotta get those often-too-fleeting ideas down! Because of our fondness for books and the multitude of journals, we occasionally must cover a favorite book with a homemade cover to keep it safe. It’s kind of like we did with our textbooks in school… just us? Often a simple cover will do, but for our favorite books and journals we go the extra step and give them a cover that is something special. For this project, we are using one of our design journals that we keep in a travel bag in case we want to write down quick notes about an idea or sketch a concept. It has seen better days, to say the least. Boro, along with its companion skill Sashiko, was originally used in Japan to patch and reinforce tattered and torn garments, so we figured why not use this sturdy boro-inspired layered patchwork fabric to cover our precious pages.
ABOUT THE THREADS
Even though our 50wt collection is named for the hand sewing, hand quilting, and mending, the Mighty Ten Hand Sewing Essentials threads are also perfect for machine sewing. In fact, we use Aurifil 50wt for the machine sewing in this project and the majority of our other machine sewing projects. Aurifil 50wt is smooooooooth and slips through fabrics with ease for hand sewing and the mercerized cotton creates less fluff when we use it in our BERNINA B790 Plus so we don’t have to clean out our machine as often as with other cotton threads. Oh yeah… and we’ve never once used a thread conditioner for hand sewing with this thread. The long staple cotton and mercerization ensure that the thread doesn’t snag on our fabric and snarl up on itself.
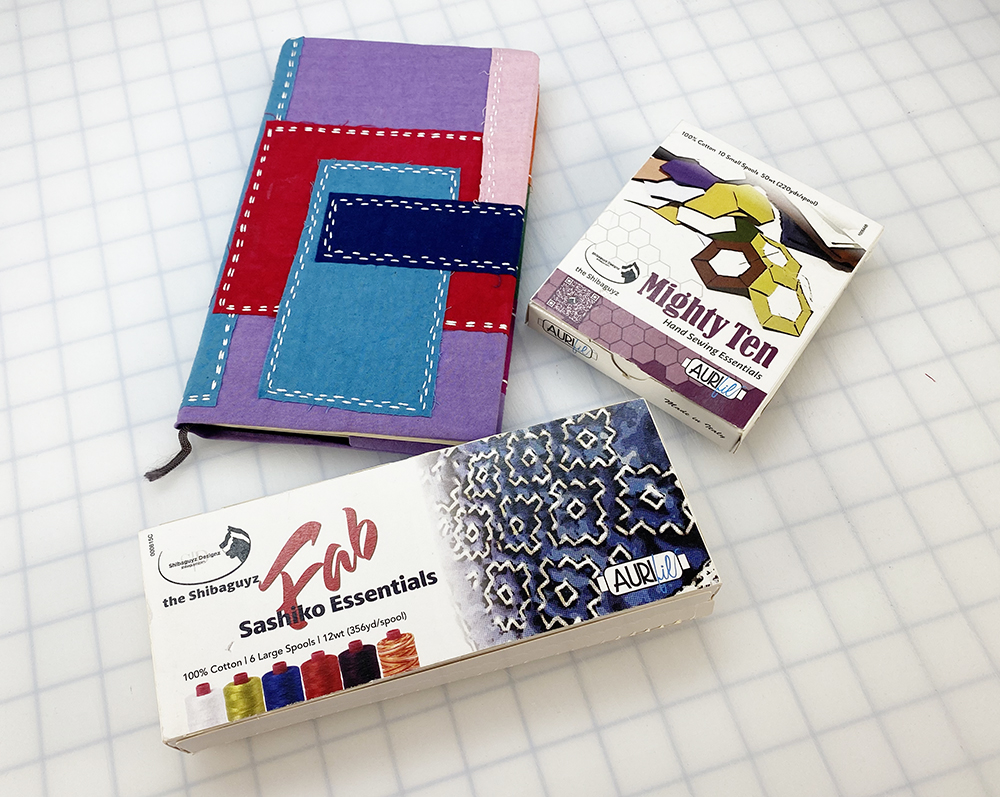
If you’ve read our book or taken one of our classes on the subject, you’ll know that for all our sashiko stitching, we use Shibaguyz FAB Sashiko Essentials thread collection from Aurifil. This 12wt, 2-ply, mercerized, long-staple cotton thread glides beautifully through any fabric we have stitched on and is less prone to tangling and snarling so we don’t need to use a thread conditioner on it. The stitch definition is bold and clear which is paramount for sashiko.

A note about both threads: They are available in 270 colors. ‘Nuff said… right?!?
USE IT UP!
We were both brought up in households with family members who lived through the Great Depression. This is the reason we give for our seeming inability to throw away anything and to find a use and re-use for everything. The phrase “that’s a really good box” is uttered regularly and don’t even think about throwing out that milk jug without checking to see if we need a new scoop for our bird seed (if you know, you know). While this need to prevent excess waste does necessitate the need for a quarterly purge that includes trips to the recycling center and donation sites, it also means we have plenty of materials on hand for recycled and upcycled projects. This, of course, is perfect for our love of scrappy fabrics for garments, home dec, and quilting. One glance at our list of classes or our Instagram feed will show you we love a good scrappy wonky quilt block and improv fabric built from fabric scraps is a thing of joy for us. For this project, we decided to use the bits and pieces of Cherrywood Hand Dyed Fabric, remainders from our newest quilt pattern: The Colors of My Pride Quilt. Mind you, our little ol’ book cover didn’t even make a dent in the gorgeous scraps from this project but that just means there’s more scrappy projects coming in the future!

SASHIKO
Sashiko means “little stabs” in Japanese and is the word used as a blanket category for a few different types of needle work used to mend, reinforce, and beautify fabrics. Our latest book uses Moyouzashi and Hitomezashi sashiko, two of the most common styles of sashiko stitches. Modern adaptations of sashiko include decorative embroidery, quilting, surface design, and, certainly, the use sashiko was originally given, visible mending. For our project, we are using moyouzashi stitches to outline our boro style patchwork. Moyouzashi follows a predetermined line using a certain number of stitches from point A to point B. If you find yourself hooked on this style of stitching (like we certainly are) and want to dive in further, there are more rules and guidelines for sashiko and thousands of stitch patterns which you can find out more about in our classes and our book.

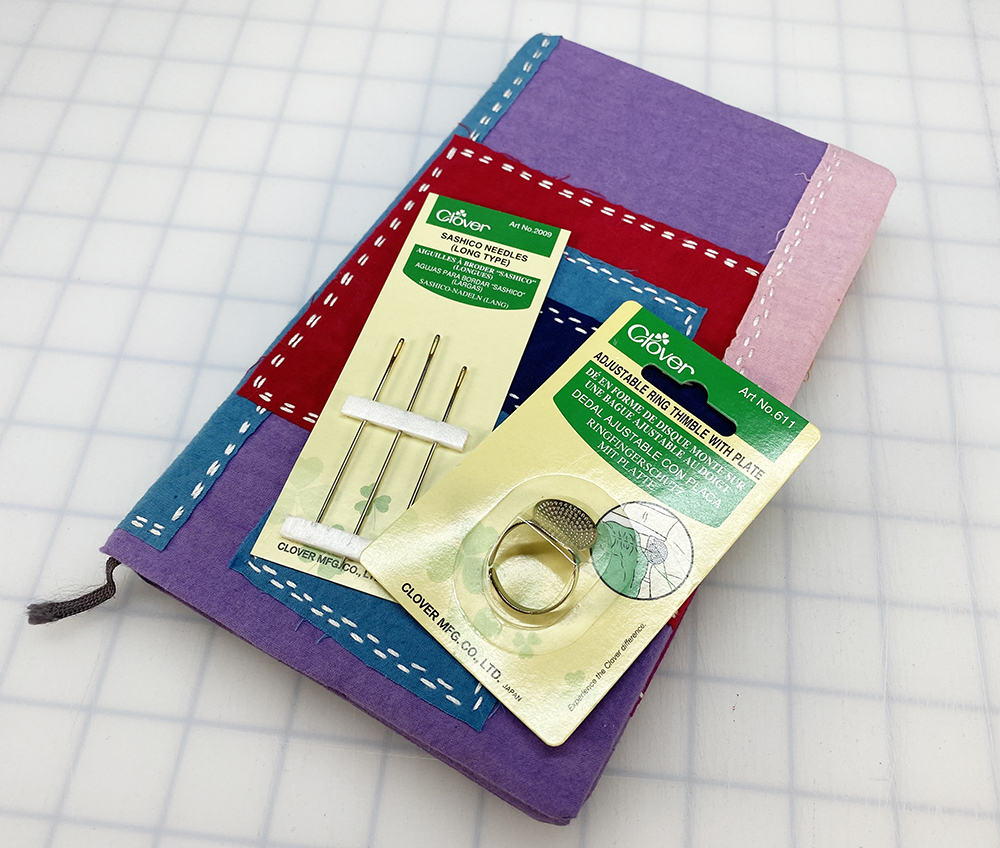
The tools used for sashiko are simple and easy to find. Aside from Aurifil’s FAB 12wt cotton thread—which we swear by—we use a long type sashiko needle, and a ring thimble with plate. In particular we’re fond of Clover’s Adjustable Ring Thimble With Plate (Clover item # 611) and their Long Type “Sashico” Needles (Clover Item 2009). A handy kit with all the basics needed to get started is available on our website HERE.
BORO
Also from Japanese needlework origins, boro translates to rags. In traditional Japanese boro, pieces of fabric are laid on top of holes or across worn spots then held in place with sashiko edge stitching or an overall sashiko pattern that holds the edges of the fabric securely in place. The purpose is to reinforce the fabric so the hole will not catch on something and cause a larger tear. Further, boro and sashiko stitching are paired to prevent a fraying or threadbare fabric from tearing. In the same manner as patching a hole, added layers of boro patches are secured with outlining sashiko or an overall sashiko pattern to hold the patches securely in place while strengthening the underlying fabric. While we do use boro and sashiko for visible mending in this exact way, what we are doing for this project is creating a new fabric using layered patchwork inspired by the look of traditional boro fabric.

THE PROJECT
Cut your base fabric
You can customize your cover to fit any book or even a photo album, you will just need to measure the book to be covered to determine the dimensions to cut your base fabric. Here’s how you do that:
With a soft measuring tape take the following measurements:
Measurement A: With book closed, take the wrapped measurement of both covers across the spine
Measurement B: Height of Cover
Measurement C: Width of One Cover
Measurement for Cuts
Add width of one cover to wrapped measurement: A + C
Add 2” to height measurement: B + 2″
Example:
Our journal has the following measurements:
A = 11″
B = 8-1/4″
C = 5-1/8″
A + C = 16-1/8″
B + 2″ = 10-1/4″
Based on these measurements, our book cover fabric should be a rectangle cut 16-1/8″ x 10-1/4″.
IMPORTANT: Remember that every book will be a little different and you will need to do your own measurements to ensure a proper fit.
LOCK IT DOWN
Once the base fabric is cut to size, we like to do an overlock or zig zag stitch around the edges. This prevents the edges of the fabric from fraying and stretching out of shape while we are working with the fabric to make sashiko stitch patterns. We used Aurifil 50wt for the overlock stitch on our BERNINA B 790 Plus to secure the edges of our base fabric. You can also use a zig zag stitch following the edge of the fabric closely. The goal is to keep the fabric from fraying and stretching while being handled.

PLAYING WITH PATCHES
Since we aren’t patching any holes or reinforcing a weak fabric, this step really is all about playing with the arrangement of the patches and making something that is inspired by traditional boro fabrics while also looking good to you. Choose fabric in colors that make you happy and arrange them so the resulting layered patchwork fabric also makes you happy. Very seldom do we ever consult a color wheel or try to create any particular shape with our patches. We simply follow a distilled concept we developed from observing so many boro garments: That larger patches usually underlay smaller patches that are laid transversely to one another. For our boro patchwork, we like to use very squared off patches because that is the esthetic we fell in love with when we saw our first boro jacket.

That said, you can certainly play with shapes and layout. Even our own esthetic tends to wander as evidenced here in one of the pillow projects from our book Boro & Sashiko: Harmonious Imperfection.

TIP: The more patches you layer on top of one another, the thicker your finished fabric will be. This is exactly what boro was meant for: it fortifies the base fabric making it denser and, therefore, stronger. But you must also remember that the thicker your fabric, the more difficult it will be to make your sashiko stitch patterns. Yes, the needle is sharp but denser fabric means you will be able to make fewer stitches at one time and your stitches will need to be larger.
After we have our patches arranged where we want them (or, at least, where we think we want them), we take a photo with a mobile device to check the layout. Doing this gives us a forced perspective view of the fabric allowing us to see the overall layout in one glance. Keep rearranging your patches and taking photos until you are completely happy with how the finished fabric will look. Now take one more photo to use as a reference… just in case a sudden gust of wind comes along or you lose a few of them while walking across the room because a Shiba Inu happens to be under foot and you didn’t see them there and you all go sprawling with arms and fabric flying. What? Just us? Think of this last photo as your Command+S.

Once you are satisfied with your layout, glue the patches into place. Now, for this step, we use a highly specialized, fancy-pants glue. Yup… good old washable school glue. It holds the fabric securely while we are working on it and it does not gum up our needle or thread. Don’t like where a patch is? Just pull it up and reglue someplace else. When you are finished, just wash by hand or in the laundry and the glue leaves no residue. Gotta love a multi-tasker.


START STITCHING
Again, for our book cover, we are using Moyouzashi running stitches to secure the edges of our boro patches. Moyouzashi is a sashiko style running stitch which means you hold the needle braced against a palm thimble and feed fabric onto the needle. The forward running stitch and the long needle mean you can have a few inches of fabric on your needle before you need to push the needle through with the palm thimble and pull the fabric onto the 12wt thread.


A final redistribution of the fabric to make sure it lays evenly across the thread and that those gorgeous stitches set beautifully on the surface of your fabric without puckers and you’re ready to go again.
Keep working around your patches until the edges are secure. We used a combination of stacked and offset running stitches to border our patches.
TIP: Note how stitching is made to not only delineate the edges of the patches securing them in place, but the patterning of the stitches matches the layer of patches. The stitches seem to disappear under crossing patches but they, in fact, do not. We usually only put one stitch under the edge of another patch to give the look of layered stitching.

TIME KEEPS ON TICKIN’
Folx always ask us how much time it takes to complete a hand stitching project like this. The answer is: as much time as it takes. Not to be too flip about it, but this is handwork and aptly, often called slow stitching. Let the process be your joy. Pay attention to how the needle and thread work through the layers of fabric. Enjoy the making of a thing with your own two hands. But, if you must know, Shannon stitched this up in an evening while we were watching Warehouse 13 and Supernatural. There was also play time with the Shibakidz. And there was a bowl of popcorn in there somewhere. So, yeah… it takes as much time as it takes.
PUTTING IT ALL TOGETHER
This is where everything comes together. Just three easy steps are all that remain!
Step 1: One Last Bit of Math…
– With Right side facing up, fold both short sides in 1/2 the width of one cover, minus 1/8”. OR (C ÷ 2) – 1/8″. We subtract the 1/8″ because the hand stitching will tend to pull in the fabric a bit.
– Press fold to crease.
Step 2: Sew Folded Edge
– Mark 3/4” from top and bottom edges on the folded fabric (4 marks).

– Sew folded fabric along the marked top and bottom edges (4 seams sewn).

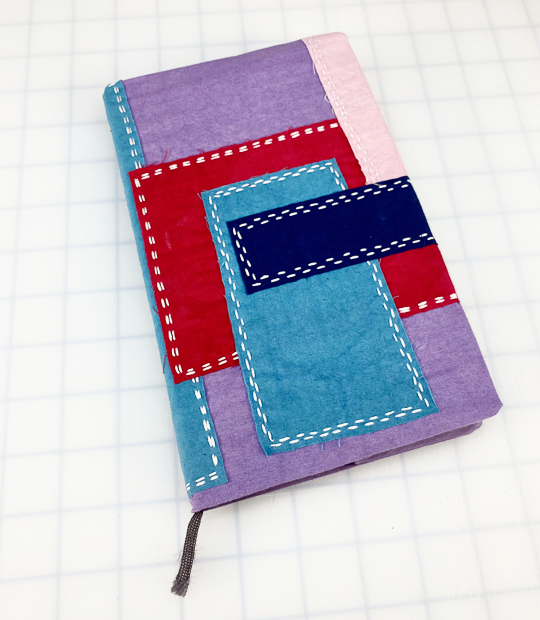
Step 3: Finishing
– Turn cover right side out
– Iron flat if needed
– Insert book
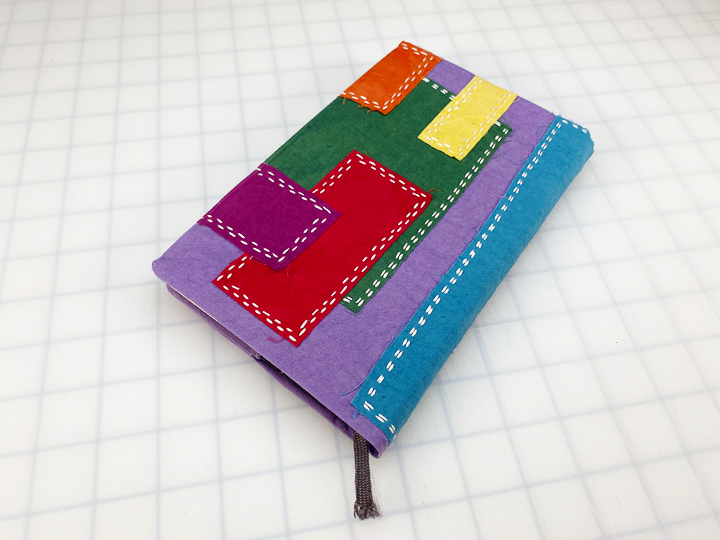
TAADAA!! Unfortunately, ours came out SUPER cute and now we want to carry it around conspicuously to show it off a bit. Maybe we’ll make another Too Cute for the Groceries tote bag (also from our book) using these colors and a minimalist stitching style. It’s not like we’re going to run out of scraps. Hmmmm…
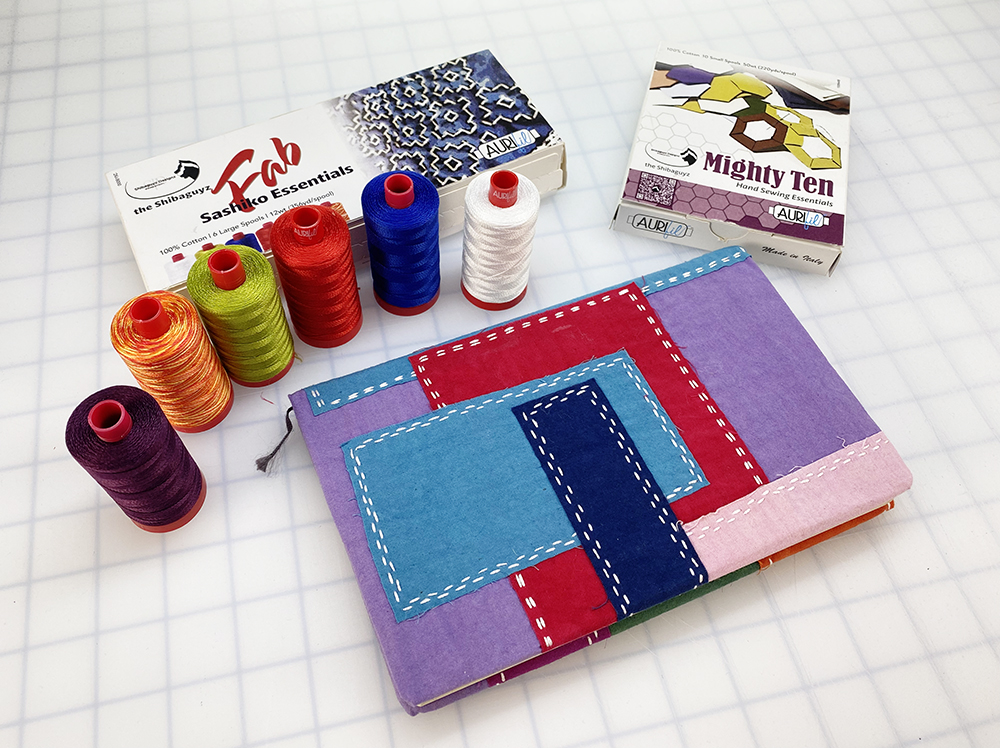
We hope y’all enjoy this project and take the chance to try boro and sashiko for yourself. Definitely do not miss out on the opportunity to work with these two amazing Aurifil threads. When we first started looking for threads for sashiko, the 12 wt was an instant winner over other thread. And the 50wt is truly the main player in our studio. If you do want to dive in more, you can find our book, Boro & Sashiko: Harmonious Imperfection, on our website or major retailers and we also have our FAB Sashiko Essentials thread collection and our Mighty Ten Hand Sewing Essentials thread collection available on our site. Oh yeah… we’re Shibaguyz on all social media channels and we would LOVE to see what y’all create. Share a photo of your stitching and finished projects and tag us and the folx at Aurifil so we can brag on ya a bit… or a lot… just sayin’…
STITCH ON!!
– Shannon & Jason, the Shibaguyz