
Greetings Aurifil family! Today, we’re delighted turn Auribuzz over to the amazing Karen L. Miller of Redbird Quilt Co. Not only is she Master Educator and Aurifilosophy Program Coordinator, she is also an Aurifil Designer and a simply magnificent artist and quilter. Karen is an Aurifil champion through and through, and is our go-to for all thread-related questions. She can troubleshoot with the best and her passion for her craft is undeniable. We’re incredibly grateful to work with her and always love the opportunity to share her extensive quilting knowledge.
Is your shop, group or guild looking for insightful, inspiring and educational information on thread? Consider booking a virtual or in-person program with one of our skilled Aurifilosophers. Learn more about Aurifilosophy and find your favorite Aurifilosopher here.
Happy Stitching!
Hello Aurifil family and welcome to the November edition of Thread Matters, the Aurifilosophy Series! For me, November is about giving thanks and I couldn’t be more thankful for the opportunity to share my passion with you, especially when it involves free motion quilting on my home sewing machine with Aurifil thread!
So, let’s chat about the quilting process and how my favorite weights of Aurifil played into quilting the gorgeous Love Blooms wall hanging designed and appliqued by Aurifil Designer and Aurifilosopher Jill Finley of Jillily Studios.

Jill shared the applique process used on Love Blooms in the February 2021 Thread Matters post. Learn how to “Elevate Your Applique” by clicking HERE.
After watching Jill’s process and falling in love with the project, I was delighted that Jill asked me to quilt the Love Blooms quilt and even more delighted that I now get to share that process with you! Let’s get started!
PREPARATION
Remove all threads that might show through the top fabric then press. With an applique quilt, it’s important to place a plush towel on the ironing area and press the quilt right side down. This step preserves the lift of the applique and allows it to retain its dimensional appearance.

I just love the lift generated with Jill’s applique process.

MAKE A QUILTING PLAN
It’s a Zen moment between you and the quilt top. Ask yourself, has anyone else quilted this pattern? How did they do it? Search for it online by pattern name. No luck? Look at the fabric — does it give you any clues for a quilting design? In this case the border fabric really spoke to me and screamed free motion continuous curve quilting — why challenge a good thing? When quilting around applique flowers and leaves, I love to enhance the applique with quilted feathers. Another thing that comes to mind when quilting applique is that a dense background fill works to give the applique a trapunto type look. All these ideas sounded great to me– sold!!

TESTING OUT A QUILTING DESIGN
My favorite notion to test out quilting designs is Quilters Preview Paper by Quilters Touch. This mylar-like transparent paper on a roll is 20 inches wide by 25 feet long. I position it on the quilt or a section of a quilt and use a dry erase or permanent marker to “test drive” my design ideas on the paper. Use caution to not mark your quilt top with these pens… ask me how I know!!

The one thing I love about this approach is that the design ideas can be drawn full scale, unlike playing with a design on your iPad or tablet where everything is scaled down. With the paper being on a roll I can mark several designs without erasing any of them. This allows me to scroll the paper back and forth to preview each design multiple times. I’m quite a fuss-bucket when it comes to making a final decision on the design so I find scrolling each design, full-scale over the actual quilt top really helps.
Note: The dry erase marker will wipe clean with a dry paper towel. Be sure to NOT get the dust on your quilt top. If you use a permanent marker, add alcohol to the paper towel to remove the marks from the Quilters Preview Paper.

CHOOSING THREAD WEIGHTS AND COLORS (this is the fun part for me!)
Thread Weight: This is such a personal choice!! For me though, I think about how much I want the thread to show. If I want the thread to take center stage, I’ll choose a 12 or 28wt. If I want it to take back stage I’ll choose 40, 50, or 80wt.

Thread Color: Regardless of weight, I generally quilt with thread colors that blend with the fabric enabling those pesky “oopsie” moments to go unnoticed. Audition thread colors by unwrapping thread from the spool and positioning it over the fabric. It’s sometimes hard to choose thread color when it is wound on the spool so I find it helpful to unwind a single strand.


LAYER AND BASTE
These two steps can have a BIG impact on the success of your quilting. There are a few important things to consider.
Batting: I’d love for the applique on this small wall hanging to pop off the background after quilting. For this reason I chose to use a soft, natural, and lofty batting like Quilters Dream Wool. Wool has amazing loft, washes and dries in cool temps, forgives folds and creases, and gives a plush look to quilting stitches. These advantages are why I use this batting for most of my quilting projects. Had I chosen to use a cotton or cotton blend batting, the applique would still be beautiful but with much less loft.

Backing: Generally, I choose a busy and colorful backing for my quilting projects. A busy backing accommodates thread color changes top and bobbin and takes away from the worry of the back needing to be perfect. I highly recommend beginner quilters start with busy backings. Now, if this were a whole cloth quilt where I was using one color of thread, I would certainly choose a complementary solid fabric for the back so all the beautiful quilting would show both top and bottom.
Basting: Personally, I prefer to pin baste my quilts because it gives me just a bit more time to tune-in to the fabric design and the overall ‘feel’ of the quilt top. This step of the process often helps me make final decisions about my quilting choices. Be sure that your backing fabric is taped or pinned down taut without stretching the fabric out of shape. This helps avoid the dreaded fold or crease on the back of the quilt. I use quilters safety pins that have an elbow in them and baste about every 4 or 5 inches, targeting areas where I know I won’t be quilting. A poor job of basting can result in excess fabric trapped on top or bottom. It’s worth investing just a bit more time to do a great job of basting.

STITCHING IN THE DITCH
Some quilters use this step to stabilize the quilt top after basting. For years I’ve chosen to use Aurifil 12 and 28wt to avoid “stitching in the ditch”. It’s really hard to stay in the ditch sometimes! I love how the thicker Aurifil threads look on top of the fabric, not hidden in a seam. So, grab a walking or even feed foot, find a heavier weight thread in a color that complements the area you want to quilt, quilt just outside or inside of the ditch, and mark this step as done. For me, Aurifil 28wt cotton, color 2605 worked perfectly for Love Bloom’s grey sashing and Aurifil 12wt color 2375 blended well with the outer border.
Some tips for stitching outside of the ditch with Aurifil 12wt or 28wt cotton:
- Use a walking or even feed foot. This specialty foot helps feed both the top and bottom fabric through evenly. When quilting with an added layer of batting it is incredibly helpful. Some might ask– why not use rulers for this straight line stitching? I find that when quilting runs are longer than 10 or 12 inches, I can achieve a much more consistent stitch length and straight line by using a walking foot. Give both techniques a whirl though and see what works best for you.
- Increase the stitch length to show-off that beautiful thread! You’ll be happy you did. For top stitching with Aurifil 12 or 28wt, I set my stitch length somewhere between 3.2 and 3.5. Note: I start and end this stitching with smaller stitches therefore “locking” threads on both ends.
- Choose your bobbin weight wisely! I find that the slightly heavier 40wt 2 ply thread is necessary when I quilt or topstitch with an Aurifil 12wt thread on top. When working with any other weight on top, I use Aurifil 50wt in the bobbin. Aurifil 50wt is the most economical weight to purchase.
- Use the Superior Titanium Coated Topstitch needle size 90/14 or 100/16. The larger, elongated eye and a groove all the way down the shaft make this needle ideal when working with heavier weight threads. The groove allows the thread a place to hide as it travels through layers of batting, backing, fusible, and more!! Have you tried these needles? You’ll love them.

BACKGROUND FEATHER QUILTING
I was totally sold on adding a few free motion curled feathers to this beautiful applique quilt. Let’s chat about that process a bit.
If I’m going to add a feather to any particular section I’ll quilt the feather first so it can grow and flow without working around background stitching. I start by drawing the curled feather spine with an air or water soluble pen. The Dritz Dual Purpose Marking Pen is my favorite because it has both air soluble (purple) and water soluble (blue) ink in the same pen. Coming in 2nd place for marking a curled spine is the Sewline Duo pens. One is a marker and one is an eraser. These have worked wonderfully for me as well.


I begin stitching bump-back curled feathers at the base of the spine, generally working up the inside of the curl first, stitching back down the spine and working my way up the outer curl to complete the feather. By working the inside of the curl first you are less likely to trap excess fabric in the center of the feather. I love quilting feathers!! I have several blog posts and a YouTube video about stitching curled feathers. Check them out here.

I generally put a line of “echo” quilting around the outside of a feather, adding a bit more interest to the overall look. If I was unhappy with any of the initial feather plumes I would use the echo quilting as a way of fixing a plume that looks a little flat or out of shape. After quilting and echoing the feather I’ll take the opportunity to stitch the background filler in that area.


BACKGROUND FILLER QUILTING
Ahh, the joy of dense background fills on applique quilts! If you want applique to pop off the background, quilt a dense background fill around it. On Love Blooms I choose to quilt a nested swirl motif. It’s fairly easy to execute, allows you to move around the quilt with minimal stops and starts, and the density of the fill is easily modified. Here are my thoughts on dense background fill quilting:
Thread color: I’m repeating myself, but I almost always choose a thread color that will complement or match the background fabric. In this case Aurifil 50wt color 2021 was perfect for Love Bloom’s dotted background fabric. I used the same thread color and weight in the bobbin.
Thread weight: Aurifil’s 2 ply 50wt thread is the best choice for dense background quilting. It is fine yet strong, your machine will not complain if you have to backtrack on previously stitched lines, it’s the most cost effective Aurifil weight to purchase, and it stitches out wonderfully!! If I don’t have the right color available in 50wt I would use Aurifil 40wt 2 ply on top and 50wt in the bobbin.

With nested swirls I don’t generally “plan” my attack. I start nearest a finished feather and work my way around the quilt top with swirl, echo, travel, and swirl, bumping each new swirl into others around it to make it “look” nested. Sometimes in the middle of the swirl I’ll close the loop, therefore making the inside of the swirl look like a pebble. If I find myself trapped in an area where I can no longer swirl, I echo my way out of that small area. As long as there is a bit of movement or curve to the echo, it will blend perfectly with the motif. Have fun with it — it’s a really effective background design and a great motif to master.

One final note about quilting around applique. Many people ask if they should “stitch in the ditch” around the applique. In my opinion there is no right or wrong choice. I think most professional quilt judges LOVE when you quilt in the “ditch” around applique (but do it well because they don’t want to see those stitches), but honestly, my approach changes from quilt to quilt. Sometimes I’ll quilt around the applique first, and sometimes I’ll bring the background fill up close to the applique, allowing it to act as my ditch quilting. On some quilts I’ve chosen to quilt 1/8″ away from the applique, helping elevate the applique with quilting. I highly recommend playing with different approaches to see what you like the best.

BORDER QUILTING
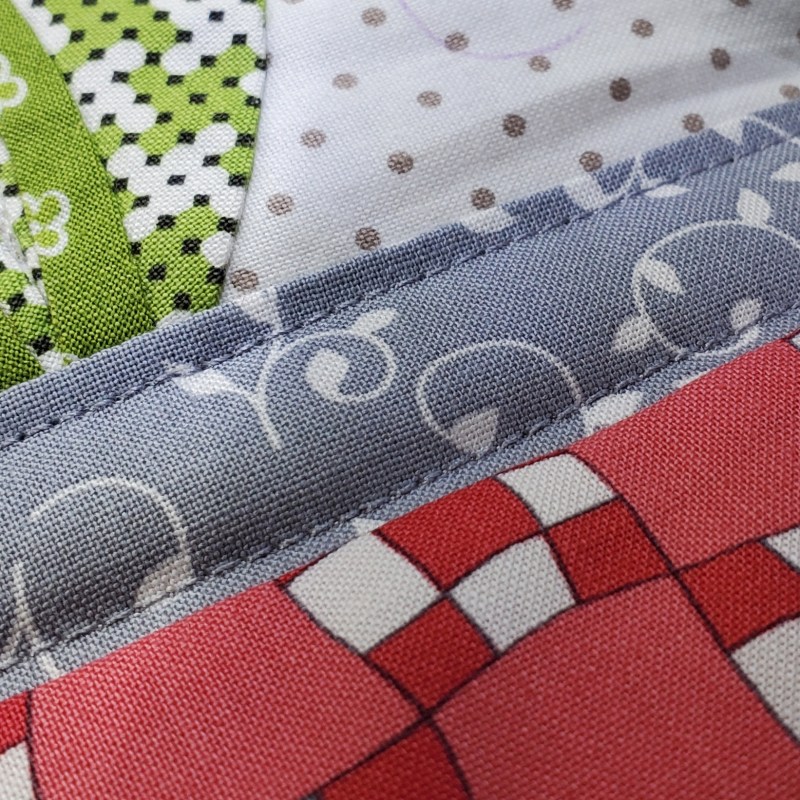
Borders can make or break a quilt and it’s often hard to choose how to quilt them. With Love Blooms, the checkerboard border fabric design worked perfectly for free motion continuous curves, using the lines of the checkerboard as a guide for the x and y axis crossover. My best color selection for the border was Aurifil 40wt thread in color 2436. I used Aurifil 50wt in the bobbin.

Before I quilted the outside border, I stitched outside the border ditch with Aurifil 12wt on top and 40wt in the bobbin. This topstitching gave me a place to travel when moving from row to row of the continuous curve quilting. Don’t fuss too much over the perfect curve in this design. Remember the galloping horse rule: as long as the quilting looks great when viewed from a galloping horse, it’s good enough!!

If you need a little guidance marking or quilting the continuous curve design, check out My Tutorials. With the checkerboard border fabric Jill used on Love Blooms, the “marking” step is already complete.


I was sad to send Love Blooms back to Jill in Utah — didn’t it look lovely on my porch! Thankful to have a few months before Valentine’s Day to make my very own Love Blooms.
That my friends, is a wrap. I hope you’ve found some helpful tips and tricks for using different weights of thread for free motion quilting in this Thread Matters post. It’s always my pleasure to share with you!
Interested in working with me to quilt feathers on a home machine? Be sure to check out my upcoming ZOOM Workshop with CraftyMonkies. The Workshop enrollment link will be listed soon! Notifications will also go out via my Newsletter. Subscribe to my Newsletter here.
Learn to use all the luscious weights of Aurifil thread by attending my upcoming Aurifilosophy program hosted on ZOOM by Sew on & Sew North of Langdon, ND. Enrollment for this event scheduled for 11-16-2021 is open here. All public Aurifilosophy events are shared on Facebook here.
To create your own Love Blooms mini quilt, download the free pattern here. You might also consider grabbing a Love Blooms kit, which is available here.
MORE ABOUT KAREN
Website — Facebook — Instagram — YouTube

Karen L. Miller, owner of Redbird Quilt Co. is an Aurifil designer, Aurifilosopher, national educator, author, and cheerleader of all things free motion quilting. She launched Redbird Quilt Co. to share her love of appliqué and show others how free motion quilting on home sewing machines can bring their projects to life. Karen plays with all weights of Aurifil thread and openly contributes her knowledge and experience to the greater quilting community. When she’s not home enjoying the multitude of songbirds that grace the Finger Lakes Region of NY, you’ll catch her traveling the countryside sharing her passion for quilting with Guilds and Shops alike.
Karen and her husband Cliff own one crazy Yellow Nape Amazon parrot named “Cayman”. Their children are grown and they are blessed with 8 grandchildren, many of whom love to sew with Gramma Karen!
If you’re interested in learning more about free motion quilting on home sewing machines be sure to check out Karen’s website, programs, tutorials, upcoming events and social media feeds.
This is real masterpiece😍
Maja — thanks for your kind feedback.
Karen, this quilt is lovely. Your quilting is fabulous! Thank you for sharing your amazing talent. I can tell you put a great deal of effort into writing this article. You are the best!
Aww — thanks Linda. It’s always my pleasure to share my passion with others. I appreciate your feedback and kind words. Hope to see you Friday at Aurifilosophy in Big Flats ??